Report views
The reports you create may be comprehensive and contain a large number of options, KPIs and other metrics that maybe will not always all be needed at the same time. For example, if your paginated report has 10 columns, but you only want to show call center managers 7 of them, you would typically have to create a copy of the original report and then remove the 3 extra columns. However, creating separate reports to accommodate each (small) change in the content of a report may quickly become difficult to maintain.
This is why, for reports that contain a lot of data and are not intended to be used in their full form with all users, reports can instead be modified to show only the metrics needed for a certain user profile, while still preserving all the data and metrics within the report in the background. You can do this with the Report Views feature, which is a powerful tool used to facilitate the way users interact with reports, allowing them to focus only on the most relevant information at a time, as opposed to everything the report contains. With this feature, you can also control the way a report is displayed, what the report page size is, how the fields are resized etc.
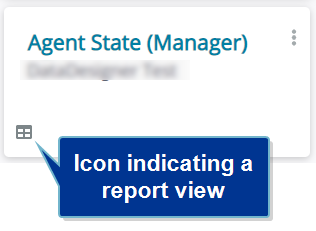
A report view (as opposed to a full report) is indicated with the view icon, as can be seen below:
From a user perspective, in the Reports tab of Reporting, individual report views function the same way reports normally do.
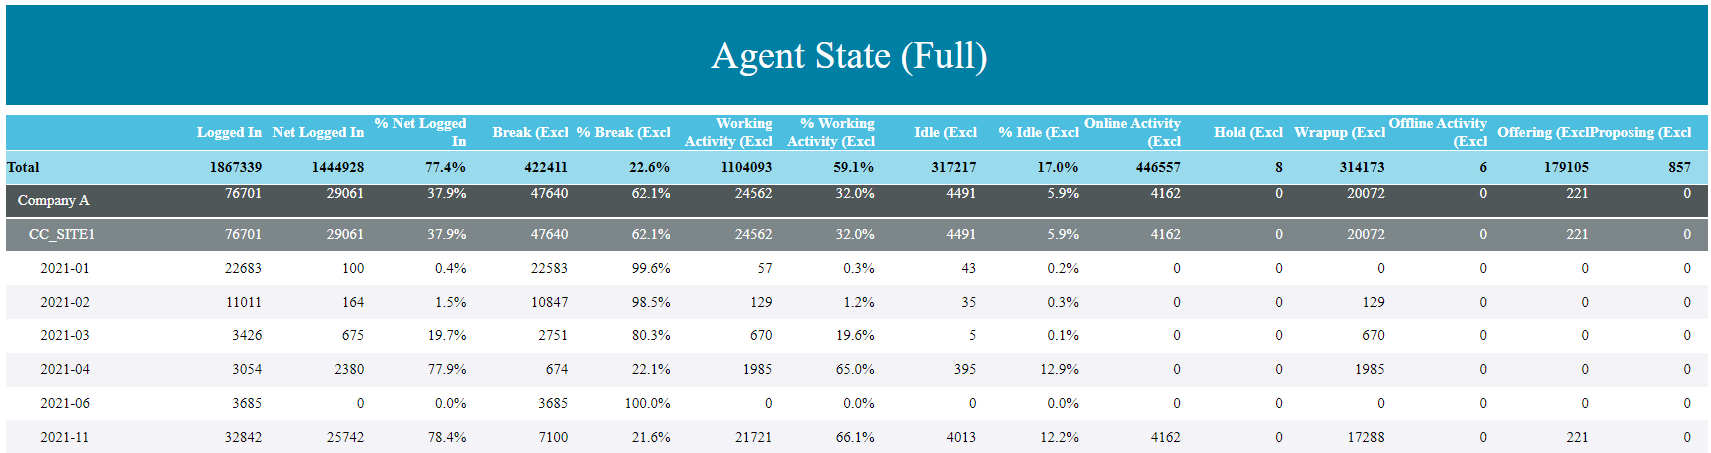
Multiple views can be made for the same report, depending on the purpose, audience, or other motivation – for example, a contact center manager and supervisor may be interested in different levels of detail in their reports. In such cases, the manager may have more use of a higher-level report, while a supervisor would benefit from more specific, detailed reports. Examples of differences in report views are illustrated in the screenshots below.
Manager report view example:
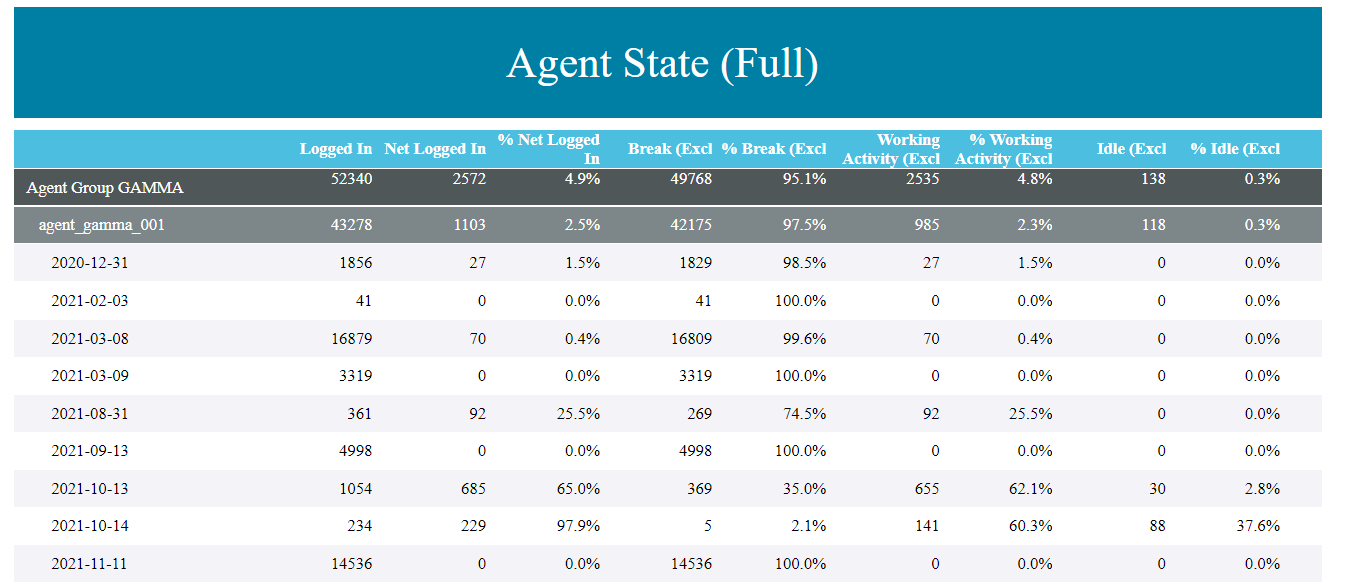
Supervisor report view example:
Creating a report view
A new report view can be made from any report that has been shared with the user. This includes all available sharing levels.
|
Note In order to be able to create a report view, the data source of the base report has to be shared with the user, as well (by an Administrator or Data Designer). |
To create a new report view, follow these steps:
- In the Reports tab, click +Create new report view
 .
. - In the pop-up window, enter the desired report view title in Report view name.
- Click Select base report, and then from the dropdown list choose the existing report for which you want to create a new view. You can use the search field for faster access.
|
Note The base report can later be changed if needed by opening the view and clicking the base report in the middle section of the top menu of the report view. From there, you can choose a different base report from the dropdown list. |
- Click Create report view to finish the creation process. A new window opens.
- In the Report View Editor, define the settings for your new report view as described in the sections below.
- Once you have finished setting up the report view, make sure to click Save to preserve the changes, and then click View Report
 in the upper right corner of the window to open the report view, set up any necessary filters and/or settings, and finally generate the new report view.
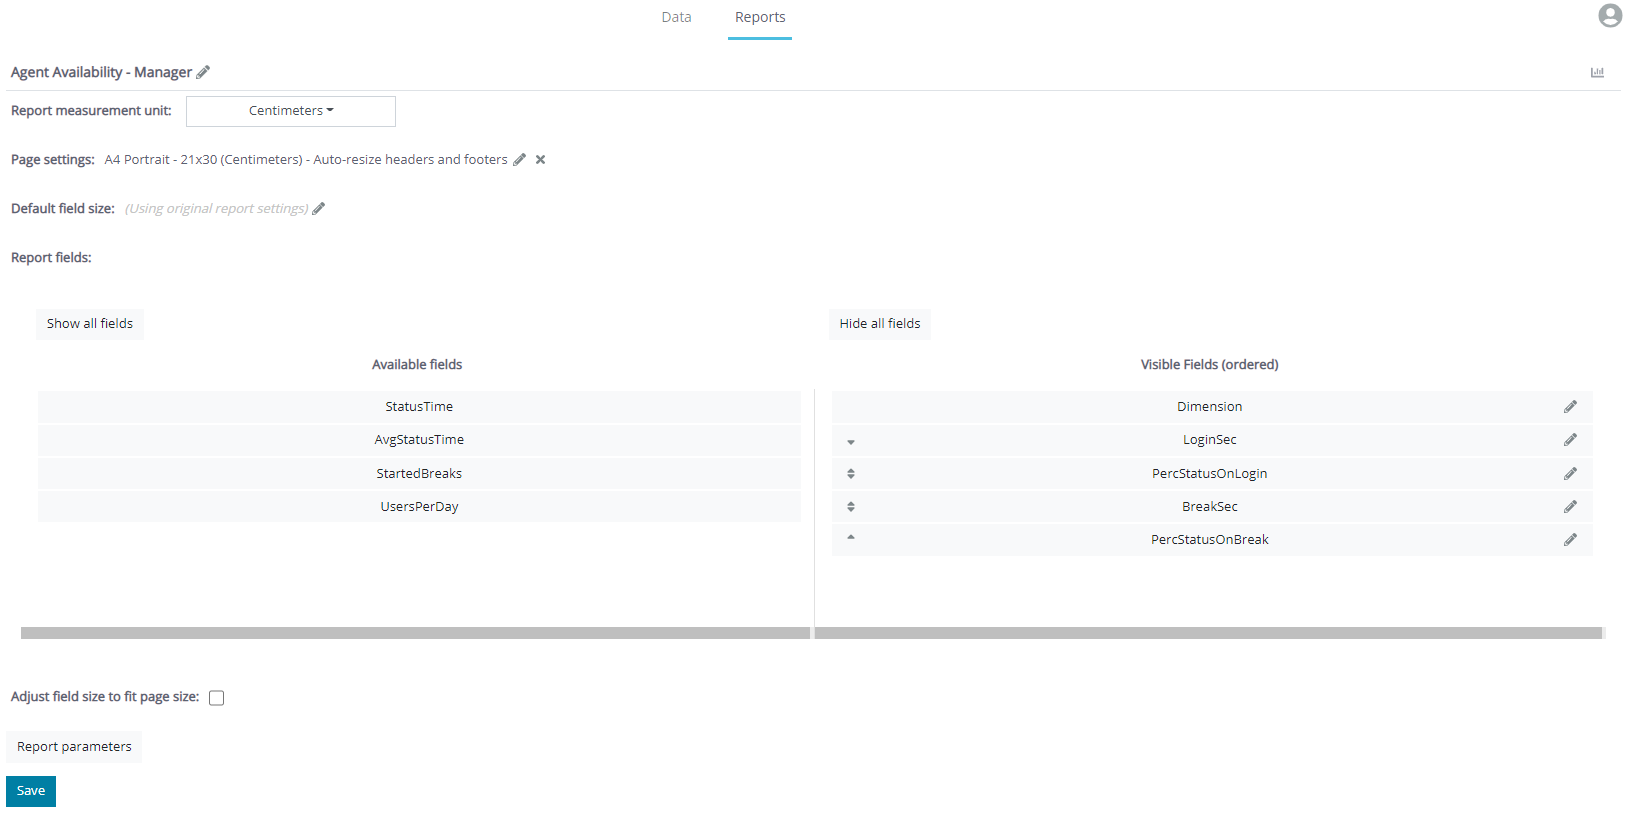
You can see an example of the Report View Editor below:
|
Note The upcoming sections focus on report view settings you can customize. However, if you leave some of the settings undefined, where possible, the default report settings (defined by the Report Designer in the original report) will be used. |
Report view name
Click  to edit the report view name. You can modify this setting at any time, but it is recommended to retain a resemblance to the original report title for clarity. This name is shown in the Reports tab and pane.
Report view title
Click to edit the report view title. You can modify this setting at any time, but it is recommended to retain a resemblance to the original report title for clarity. This title is shown on top of the report view.
Report view description
Click to edit the report view description. The report view description is shown in the Details, in the top menu of a report view. If left unedited, the default report description of the base report is used.
Report measurement unit
In this section, you can define which unit of measurement you want to use in your report. Click the dropdown menu and then click the unit you want to use.
When you change the unit of measurement, all existing measures are converted to the equivalent value in the new unit, thereby preserving all the previously entered sizes.
Page settings
Clicking in this section opens a new window. Here, you can modify the settings described below:
- Paper size: Choose a predefined paper size, or enter a custom page width and height (in centimeters).
- Page orientation: Choose a landscape or portrait page orientation.
- Auto scaled: If this checkbox is selected, the report view headings and footers will be automatically resized to fit the new size of the report view. If it is cleared, they will stay the default size, as defined in the original report.
Click Apply settings to save your new report view settings. Once you've applied any changes, they will be shown in this section of the Report View Editor.
Fields default resize
Clicking in this section opens a new window. In this pop-up window, you can choose if you want to use a fixed width value or relative width scaling of the size of all the fields (columns) in the report view. A default value is set when creating the (original) report, but it may be modified here for the report view. You can modify the following settings:
- Use width scaling: If this checkbox is selected, enter the relative width scaling percentage in Width scaling coefficient (%). This means that the width of each field will be scaled to the entered percentage of the default full size.
- Fixed width value: Available if Use width scaling is cleared; enter the report view fixed field width value (in centimeters). This means that the width of each field is going to be the specified size in centimeters.
Click Apply settings to save your new report view settings. Once you've applied any changes, they will be shown in this section of the Report View Editor.
Report fields
|
Note If you do not have proper access levels to the base report, you will not be able to see or use this section. |
In this section of the Report View Editor, you can define which fields from the original report will be used in the report view. Two columns are available:
- Available Fields: The fields that are available in the original report. The fields that remain in this column are not shown in the report view.
- Visible Fields (ordered): Fields you've chosen to display in the report view, ordered in the way you want to display them. Fields shown top to bottom here will be shown left to right in the report view.
|
Note If available and properly set up in your data source, field labels and their translations are shown in the Report View Designer. If not available, the default name of the value in your database is shown. |
Move the fields you want to use in the report view from Available Fields to Visible Fields. Similarly, if you want to remove a field from the report view, drag it back to Available Fields.
To change the order of the visible fields in the report view, drag them to the position you want to use them in. The top-most fields in this section are the left-most fields in the report view table.
|
Note Dimension fields are always visualized first in a report and their position in the report cannot be changed by dragging them below other fields, or dragging other fields above the Dimensions. |
Additionally, you can also change the individual width settings for each field. To do so, click in the right-hand part of the field you want to edit, and then apply the needed settings in the pop-up window, as described in Fields default resize. These settings will refer only to the individual field you edit, and not the report view as a whole.
|
Note If you define the individual width of a field, the settings defined in Fields default resize |
Adjust field size to fit page size
If you select this checkbox, all field sizes will be adjusted to best fit the page size you use for this report view. In case any individual field settings are changed, settings will be preserved and adjusted to fit the page size, while preserving the set up field size ratios.
If left cleared, all the fields will use the default report size, or whichever size modifications are applied to the report view or its individual fields, as described in the previous sections of this document.
Report parameters
In this pop-up window, you can set up the default, background and hidden filters and settings for your report view.
|
Note If you do not have proper access levels to the base report, you will not be able to see or use this section. |
All the parameters available in the original report are shown. In this window, you do not need to set the mandatory filters and settings to be able to confirm the changes, but users will still have to set the mandatory parameters when generating the report view. You can do the following:
- Background parameters: Next to each filter and setting, there is a checkbox. If you select it, you set that filter or setting as a background parameter. Once you set up a background parameter, when users want to set up a filter or setting and they choose their options from a dropdown list, they will only be able to choose from the options you select in this window. None of the dropdown options that you do not select in this window will be available to the users of the report view. Additionally, any filters or settings you set up in this window will also be loaded as the default filters and settings for this report view. Users may need to apply some of the filters (for example, if not all mandatory filters are set up in this window), but they can also change the filters and settings on their own if needed, among the filters and settings available to them.
- Hidden parameters: If you set any filter or setting as a background parameter, a second checkbox appears next to it. Selecting this checkbox too will make a background parameter a hidden parameter, as well. This means that the parameter will automatically be applied to the filter view. Furthermore, it will be hidden from Viewers, and they will not be able to change it or interact with it in any way. This will also hide the parameter from the Filters and Settings Sumup section of a report, as described in the Reporting Standard Reports Guide.
|
Note If a filter or setting is a single-select item (e.g. data grouping levels only let Viewers choose one option from the dropdown list), in the context of background filters, you can select multiple options to be shown to the Viewer, but they will still be able to only choose one of them to generate the report. |
|
Caution
|
Select style
From a list of available styles, choose which style set to apply to the report view. The style set will be applied to all elements in the report (that have the appropriate style-related settings). This setting has higher priority than the style settings of the original report.
Click Remove custom style to revert to the original report style settings.
|
Note In order for styles to be applied properly to all relevant elements of the report and all its views, the original base report needs to be set up in an adequate manner. If any issues regarding styles and their application arise, contact the Report Designer. |
Individual styles and style sets can be modified in the Styles tab, as described in Styles.