Reports tab
After a successful login, the Reports page in Reporting opens. You can view, print and export reports and report views.
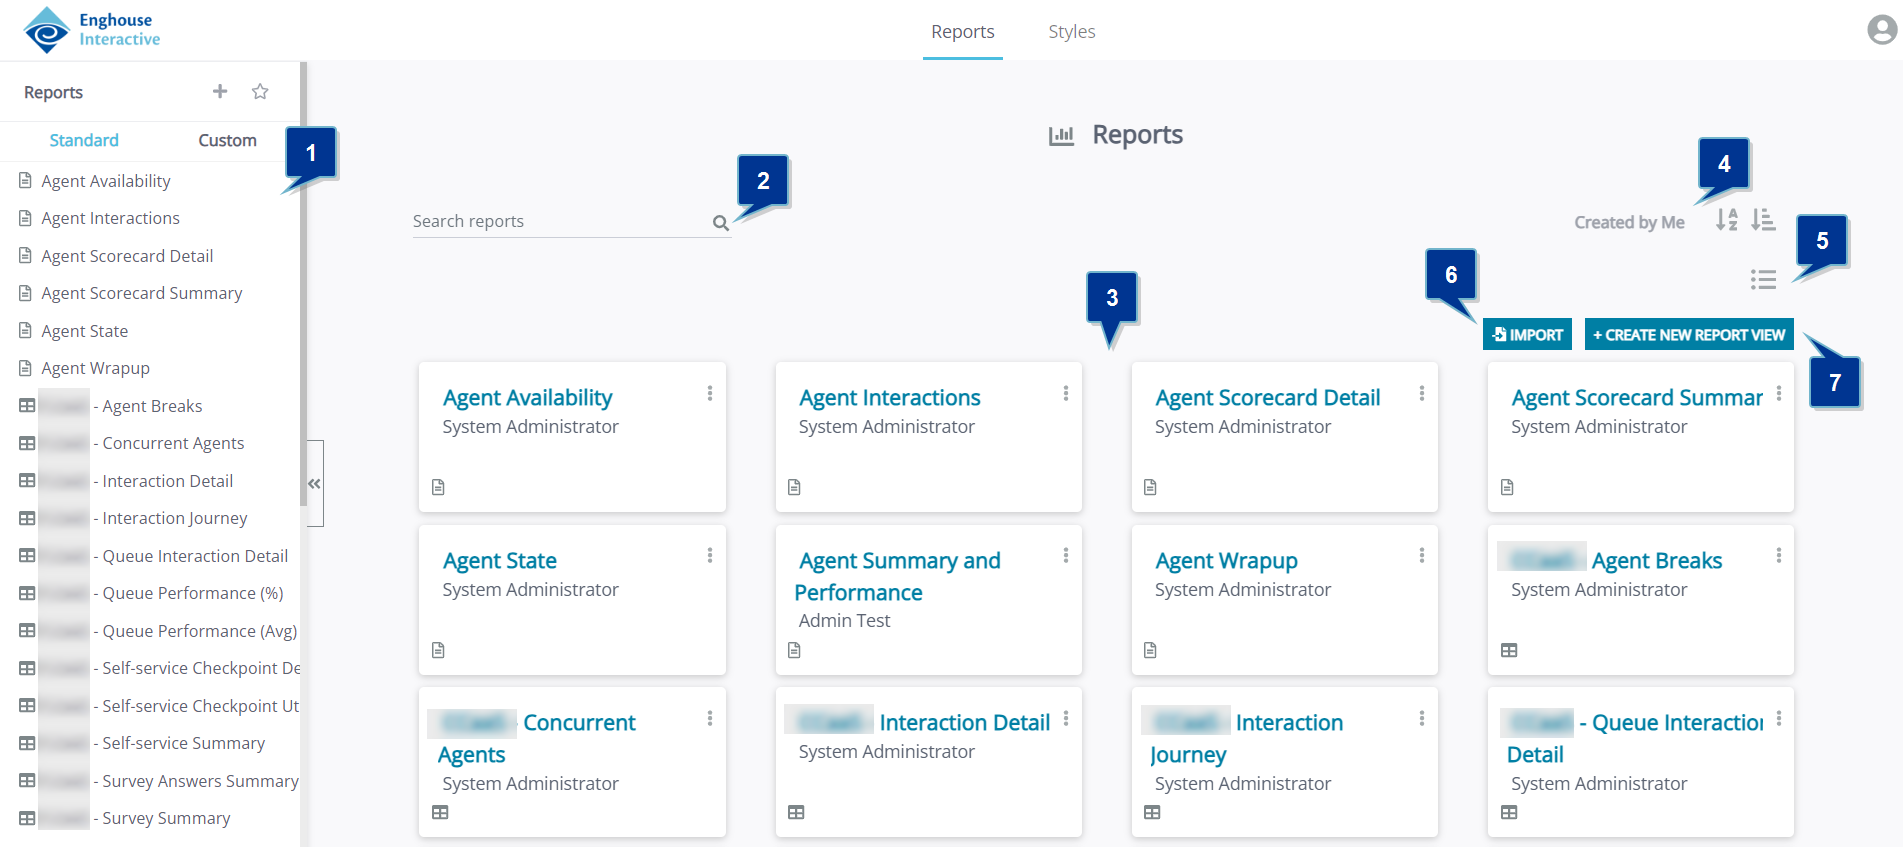
The main parts of the Reports tab are as follows:
- Reports pane on the left side of the screen,
- Search bar,
- Report tiles in the central part,
- Sorting tools
- Table and bulk operations view (see more below and in Report and report view export and import),
- Import tool (see more in Report and view import),
- Create new report view (see more in Report views).
Reports pane
In the Reports pane, on the left-hand side of the screen, a list of available assets that are shared with the logged-in user is provided. The Reports pane can be hidden by clicking the arrows on the left outer edge of the pane.
Depending on how the report Designer organized the assets, they can be standalone or arranged in folders. All assets belonging to a folder are slightly indented and listed under the folder title.
The Reports list is also divided into two sections. These sections are available in the two tabs in the upper part of the Reports pane. They are as follows:
- Reporting premade reports and views, provided by Enghouse Interactive, and
- Custom reports, where all reports or views that are custom-created by the users of your system are stored.
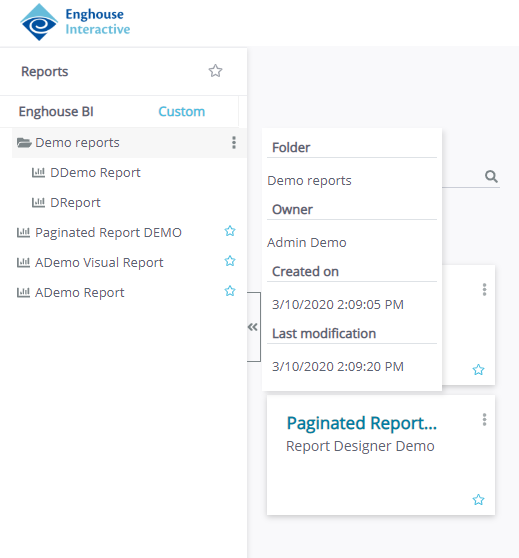
Hovering the pointer over a folder or asset name opens a pop-out with an overview of details about the asset or folder, including the name, Owner and relevant dates.
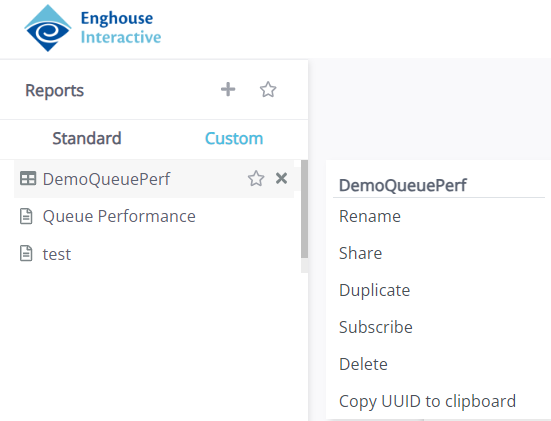
Clicking the Options of an asset, either in the Reports pane or one of the report tiles, opens a new menu. Here you subscribe to an asset, duplicate it (if it is a view) and copy its UUID; alternatively, if you own the asset, you can also rename it, share it, or delete it. The Subscribe option is described in detail in Automated report delivery.
Sort and search
All the assets are available in the Reports main window, in form of tiles in the central part of the window. If there are assets grouped in folders in the Reports pane, this structure is not shown in the Reports window, as all the reports and views are shown individually. However, the assets can be sorted and searched through for easier access.
Sorting is performed alphabetically or by creation date, in ascending or descending order. The buttons for sorting control are at the top-right corner of the main window, under the Reports window title.
You can also filter out the shown tiles by clicking Created by me to show only the assets owned by you.
A Search reports input field is available for quick asset locating. The search filter is applied as you type and it instantly displays the results of your search. This search filter does not apply to the Reports pane, only the tiles.
Furthermore, you can also choose to see the Reports tab in a tabular form. You can switch to this mode by clicking  .
.
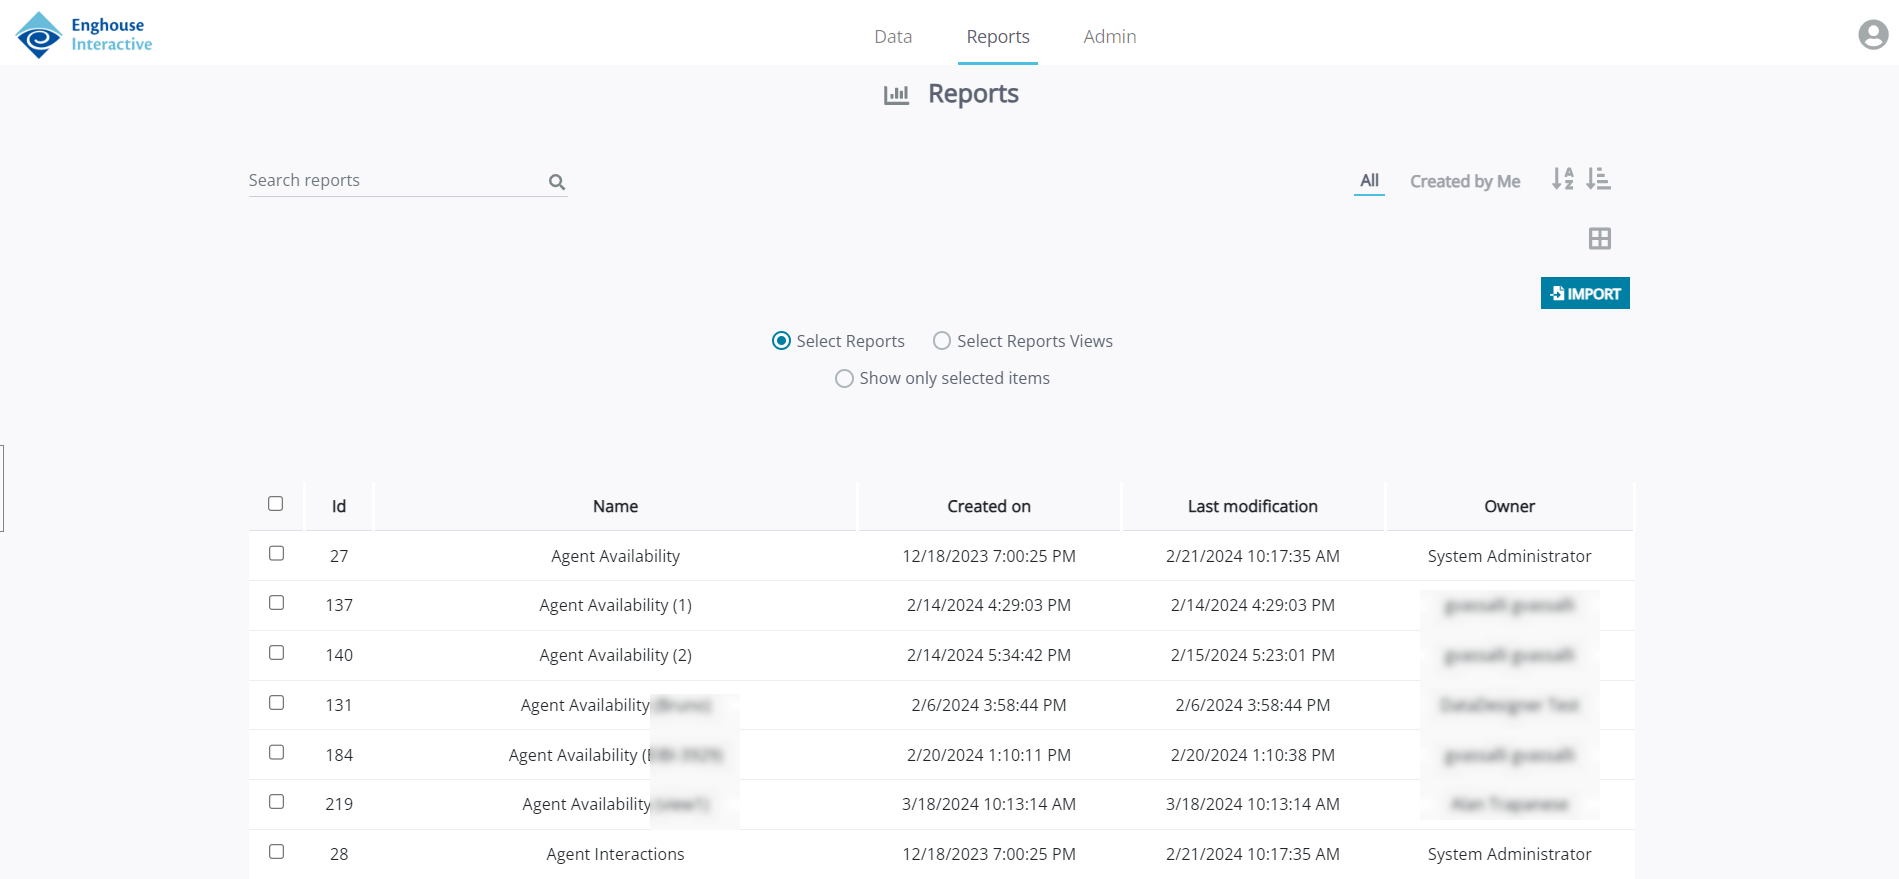
Here you can see the most important data about the reports, such as the UUID, name, relevant dates and the owner. In the first column of the table, you can select all or just some individual assets. You can switch between showing standard reports or custom reports by clicking Standard or Custom in the toggle above the table. You can also switch between showing only reports or only views by selecting either Reports or Report Views.
Each asset row also has the Optionsmenu at the right-hand end of the column. Here you can see the same options as described above.
Additionally, when you select one or more assets, additional options are shown for the asset(s):
- Configure sharing: Add or remove access rights from users or groups. See Report and report view sharing for further details.
- Delete: Delete the selected asset(s). You must be the owner of an asset to be able to delete it. If there are any assets among the selected that you do not own, a warning message will be shown to indicate which assets the action will not be performed for.
| Caution
Deleting an asset cannot be undone. Always check before confirming this action. |
| Note
You cannot delete a Standard report. This option will be disabled if you do not click the Custom option in the toggle above the table. |
- Export: Export the selected asset(s). See Report and report view export and import for further details.
|
Note
|
 in the top part of the pop-up window to see which assets you are working with if multiple are selected.
To turn the tile view back on, click  under the sorting tools in the upper right section of the Reports tab.