Submit a tenant subscription request
The Provisioning Portal enables service providers to perform routine tenant on-boarding and core tenant administration tasks with their own operational staff or to use the Provisioning Portal as a self-service tool with existing tenants or customers via external web access to the portal.
The portal can also be used as a self-service tenant registration tool that allows the service provider’s prospects to register as a new tenant and select service options via template service packages.
|
Note (for the service providers)
|
|
Caution (for the service providers)
|
To submit a tenant subscription request:
- After logging in to the Provisioning Portal, open the Tenant Registration page.
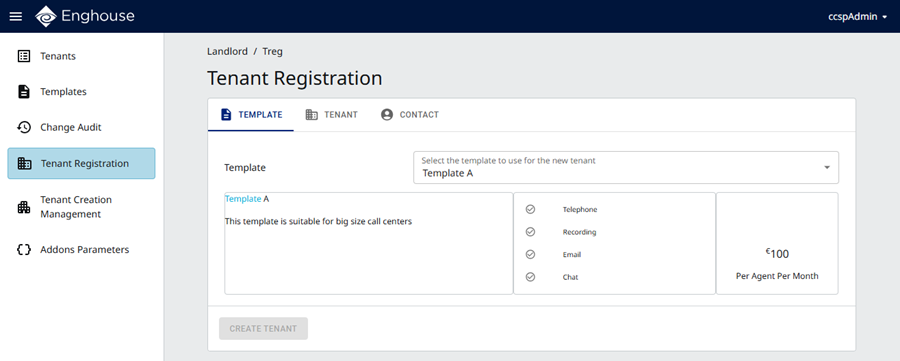
- On the Template tab, select the template to use for the new tenant.
- Click the Tenant tab.
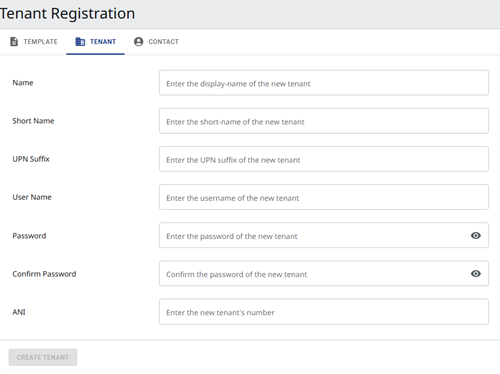
- Enter the following required information:
- Name — the tenant name you want to use, for example, KentonElectronics. The name must not contain spaces, underscores, or special characters.
- Short Name — the shortened tenant name you want to use, for example, ke. The name must not contain spaces, underscores, or special characters.
- UPN Suffix — the email and logon suffix for all users in the tenant's contact center, for example, kenton-electronics.com.
- User Name — the tenant administrator name you want to use, for example, keAdmin. The system prefixes ‘prp’ as the final personnel ID for the Provisioning Portal.
- Password — the tenant administrator password you want to use.
- Confirm Password — retype the password to confirm it.
- ANI — the ANI to present to the telephone network for placing outgoing calls. This is usually the main telephone number of your company.
- Click the Contact tab and enter the contact details for the new tenant.
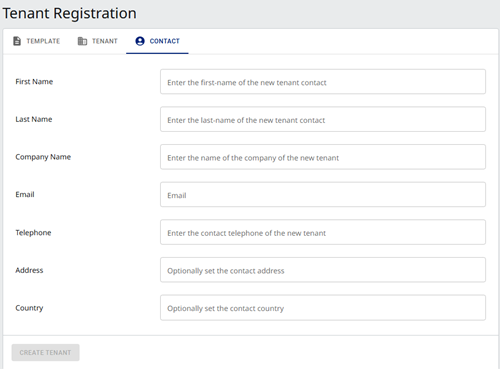
- Click Create Tenant. After submitting your request, you can check its status through Tenant Creation Management.
- At this stage, the system has accepted the subscription request and depending on your service provider's decision, the tenant provisioning process may start immediately or may be scheduled to start during off-peak hours.
- When the tenant provisioning process is complete, an email notification will be sent to the email address you specified in the subscription request. The notification will tell you how to access your tenant if the subscription request completed successfully or what to do next if the subscription request failed.
- When the tenant is cloned successfully, configure the Callback Folder email address. For details, see Edit and publish general parameters for Smart Queues.